initializa
先到springboot 官网的 springboot initializa 生成工程目录,主要生成的文件是 DemoApplication 和 pom.xml
其中 DemoApplication 如下:
@SpringBootApplication
public class DemoApplication {

    public static void main(String[] args) {
        SpringApplication.run(DemoApplication.class, args);
    }

}
pom.xml是项目的配置文件,里面的配置包含了 srping boot:
<dependency>
    <groupId>org.springframework.boot</groupId>
    <artifactId>spring-boot-starter</artifactId>
</dependency>
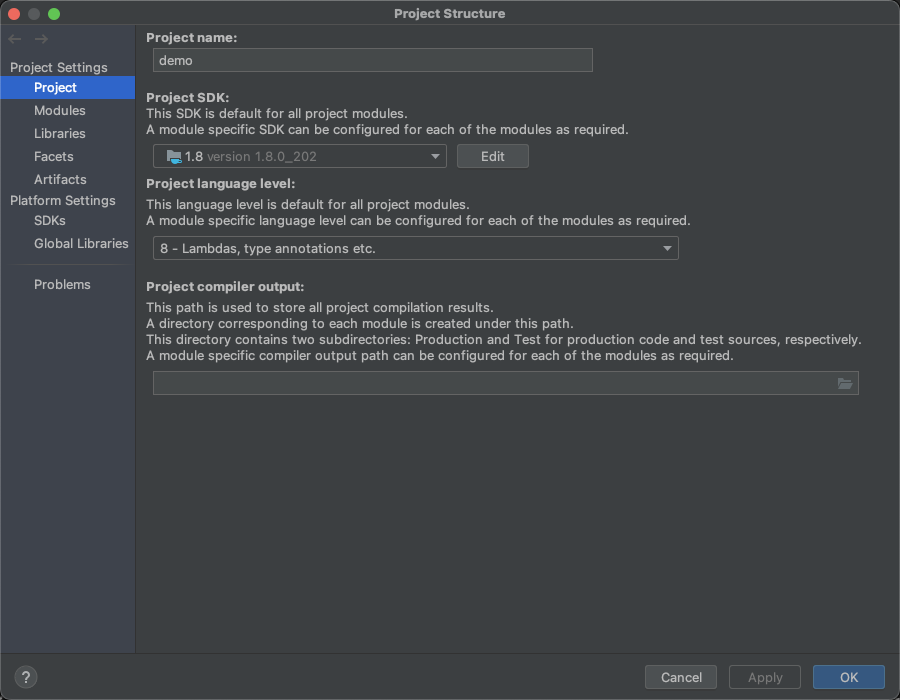
然后使用 Idea 打开工程。接着设置工程的 Project Structer 以下两项:
- JDK 版本
- Language Level

接着直接运行项目即可,不报错则继续。
spring boot web
在 pom.xml 添加
<dependency>
    <groupId>org.springframework.boot</groupId>
    <artifactId>spring-boot-starter-web</artifactId>
</dependency>
新建类 HelloController,代码如下:
package cn.kyson.demo;

import org.springframework.web.bind.annotation.*;

@RestController

@RequestMapping("/api")

public class HelloController {
    @GetMapping("/hello")
    public String sayHello() {
        return "Hello, World!";
    }
}
运行
项目目录如下:
➜  demo tree
.
├── HELP.md
├── mvnw
├── mvnw.cmd
├── pom.xml
├── src
│   ├── main
│   │   ├── java
│   │   │   └── cn
│   │   │       └── kyson
│   │   │           └── demo
│   │   │               ├── DemoApplication.java
│   │   │               └── HelloController.java
│   │   └── resources
│   │       └── application.properties
│   └── test
│       └── java
│           └── cn
│               └── kyson
│                   └── demo
│                       └── DemoApplicationTests.java
└── target
    ├── classes
    │   ├── application.properties
    │   └── cn
    │       └── kyson
    │           └── demo
    │               ├── DemoApplication.class
    │               └── HelloController.class
    ├── demo-0.0.1-SNAPSHOT.jar
    ├── demo-0.0.1-SNAPSHOT.jar.original
    ├── generated-sources
    │   └── annotations
    ├── generated-test-sources
    │   └── test-annotations
    ├── maven-archiver
    │   └── pom.properties
    ├── maven-status
    │   └── maven-compiler-plugin
    │       ├── compile
    │       │   └── default-compile
    │       │       ├── createdFiles.lst
    │       │       └── inputFiles.lst
    │       └── testCompile
    │           └── default-testCompile
    │               ├── createdFiles.lst
    │               └── inputFiles.lst
    └── test-classes

30 directories, 18 files
运行 DemoApplication
运行后可以看到类似如下打印:
 .   ____          _            __ _ _
 /\\ / ___'_ __ _ _(_)_ __  __ _ \ \ \ \
( ( )\___ | '_ | '_| | '_ \/ _` | \ \ \ \
 \\/  ___)| |_)| | | | | || (_| |  ) ) ) )
  '  |____| .__|_| |_|_| |_\__, | / / / /
 =========|_|==============|___/=/_/_/_/
 :: Spring Boot ::               (v2.7.10)

2024-08-19 14:46:27.799  INFO 23030 --- [           main] cn.kyson.demo.DemoApplication            : Starting DemoApplication using Java 1.8.0_202 on 192.168.1.12 with PID 23030 (/Users/kyson/Downloads/demo/target/classes started by kyson in /Users/kyson/Downloads/demo)
2024-08-19 14:46:27.802  INFO 23030 --- [           main] cn.kyson.demo.DemoApplication            : No active profile set, falling back to 1 default profile: "default"
2024-08-19 14:46:28.653  INFO 23030 --- [           main] o.s.b.w.embedded.tomcat.TomcatWebServer  : Tomcat initialized with port(s): 8080 (http)
2024-08-19 14:46:28.666  INFO 23030 --- [           main] o.apache.catalina.core.StandardService   : Starting service [Tomcat]
2024-08-19 14:46:28.666  INFO 23030 --- [           main] org.apache.catalina.core.StandardEngine  : Starting Servlet engine: [Apache Tomcat/9.0.73]
2024-08-19 14:46:28.836  INFO 23030 --- [           main] o.a.c.c.C.[Tomcat].[localhost].[/]       : Initializing Spring embedded WebApplicationContext
2024-08-19 14:46:28.836  INFO 23030 --- [           main] w.s.c.ServletWebServerApplicationContext : Root WebApplicationContext: initialization completed in 991 ms
2024-08-19 14:46:29.168  INFO 23030 --- [           main] o.s.b.w.embedded.tomcat.TomcatWebServer  : Tomcat started on port(s): 8080 (http) with context path ''
2024-08-19 14:46:29.177  INFO 23030 --- [           main] cn.kyson.demo.DemoApplication            : Started DemoApplication in 1.728 seconds (JVM running for 2.083)
2024-08-19 14:46:51.102  INFO 23030 --- [nio-8080-exec-1] o.a.c.c.C.[Tomcat].[localhost].[/]       : Initializing Spring DispatcherServlet 'dispatcherServlet'
2024-08-19 14:46:51.102  INFO 23030 --- [nio-8080-exec-1] o.s.web.servlet.DispatcherServlet        : Initializing Servlet 'dispatcherServlet'
2024-08-19 14:46:51.103  INFO 23030 --- [nio-8080-exec-1] o.s.web.servlet.DispatcherServlet        : Completed initialization in 1 ms
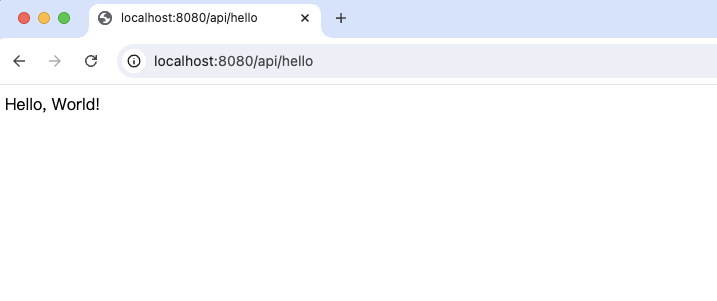
效果

开发小技巧
lombok
lombok 能自动生成 bean的 getter/setter,能显著提升开发效率,集成步骤如下:
- xml 安装依赖
<dependency>
    <groupId>org.projectlombok</groupId>
    <artifactId>lombok</artifactId>
</dependency>- idea 安装插件

- 使用 Data 注解
以 User 为例,可以这样写:
import lombok.Data;

@Data
public class UserVO {
    /** 用户id */
    private String userId;
    /** 微信openId */
    private String openId;
    /** 昵称 */
    private String nickname;
    /** 性别: 1男 2女 */
    private String sex;
    /** 手机号 */
    private String phoneNumber;
    /** 生日 */
    private String birthday;
    /** 头像URL */
    private String headImgUrl;
    /** 我的地址 */
    private String address;
    /** 创建时间 */
    private String createTime;
    /** 更新时间 */
    private String updateTime;
}
热更新
添加依赖
<dependency>
      <groupId>org.springframework.boot</groupId>
      <artifactId>spring-boot-devtools</artifactId>
      <optional>true</optional>
</dependency>
redis
下载
去官网下载:https://redis.io/docs/latest/get-started/
mac 下推荐 brew install方式:
➜ ~ brew install redis
测试是否安装成功
redis-server启动
brew services start redis
查看
brew services info redis
停止
brew services stop redis
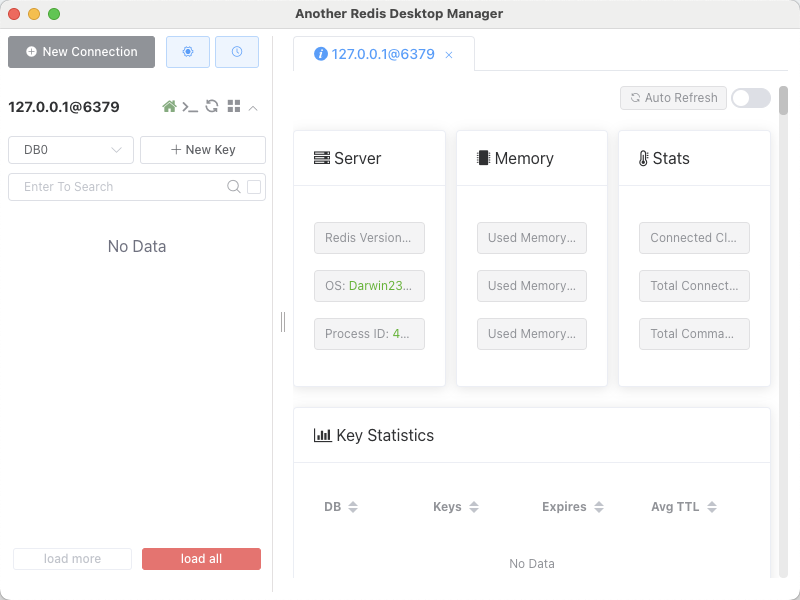
可视化

代码示例规范,注释详细,便于复现。
文章深入浅出,既有深度思考,又不乏广度覆盖,令人叹为观止。